Donate
Installing Your New California-Native Lawn
Once you’ve decided on the role of your lawn, evaluated your site conditions, chosen your lawn species, and planned for irrigation, now it’s time to start your installation. (If you haven’t taken these steps yet, I encourage you to read my earlier article here.) Soil preparation will be the next important step and the most time-consuming. Whether planting seed, plugs, or rolls of sod, the soil should have a top layer of light, fluffy soil prepared. You can do this by tilling with a machine or by hand-digging to remove any rocks or clumps. You’ll then want to integrate any amendments, such as compost, and rake out the soil to an even finished grade. Before planting, soil should be as weed-free as possible. Sometimes that involves solarizing the soil to kill any weed seed or initiating grow-kill cycles using irrigation to germinate and encourage any dormant weed seed to grow so they can be eliminated from the ground seed bank.
If the new lawn is a warm-season grass, the time of year to sow seed or plant plugs is somewhat flexible, but it is best in mid-to-late spring when soil temperatures are rising. Warm-season grasses drop seed in the fall naturally, but much of that seed becomes food for wildlife (a nice benefit for native birds, but perhaps not for a super dense lawn). If you have chosen a cool-season grass or Carex species, seeding or planting in fall is best, as it benefits from winter rain and is installed right before its natural winter growth phase.
Sowing Seed
Purchased seed will often come with some information as to how much seed is required per size of lawn and how densely to sow. You’ll want to mix the seed with clean sand to disperse it manually (sowing by hand is easy for small spaces), or you can use a seed spreading tool to help disperse the seed more evenly and across a large space. Again, making sure the topsoil is a fine, fluffy texture will help create small pockets that seed can fall into so it can be protected from predation, but also not buried too deeply under the soil level. After sowing, a very light layer of topsoil or compost can be added to the top to just barely cover the seed. In general, any seed should be planted at a depth no more than its size (i.e., a 1 cm seed should be planted no more than 1 cm deep).


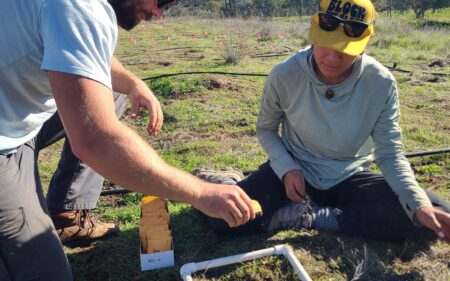
Planting Plugs
The type of species and fast you’d like your plants to fill in will decide the spacing of the plugs. Using a plug planting online calculator is a helpful way to determine how many plugs are needed for a site. Then, after all the soil prep, install your plugs, making sure the base of the plant is right at the finished grade level of the soil – not too low, creating a divot, but not too high, exposing the root mass. If the root ball is very compact, you can lightly loosen them or “tickle them apart” without damaging too much of the root structure. Grasses and Carex are tolerant of more root disturbance than shrubs or trees.
Laying Sod
Often, the sod supplier will have information on their website that will be helpful in producing successful results. However, in general, you’ll want to keep sod moist until installation and install as soon as possible after delivery. Take time in laying out each sod piece, making sure each seam is in close contact with its counterpart. To avoid continuous seams, it is advised to stagger the pieces of sod so that seams are offset. Add some compost or topsoil to the seams to help roots knit together on these edges.
Watering Guidelines for Establishing Your New Lawn
Keeping a new lawn irrigated is an important step for success. Underwatering and overwatering can both cause issues, so it’s best to check the new lawn daily. You’ll want to feel the soil for moisture content or visually inspect the plants.
For plugs and rolls of sod, the soil or sod should be moist but not waterlogged. The soil surface can dry out a bit between watering, but ideally, there is moisture one to two inches below the surface level to help new roots establish and grow into the soil. A soil moisture gauge or just probing with a finger is an easy way to test.
Irrigation for a seeded lawn is a bit different in that the seedbed should stay somewhat moister. In this case, it may require more frequent but lighter watering cycles during active germination, but uses similar principles to a sod-laid lawn. Depending on the weather, location, and time of year, that can mean irrigating multiple times a day to maintain moisture levels just in the top half to quarter inch of soil where the seed is sitting. In the first couple of weeks, think short duration but frequent watering for new seed.
Remember, under- or overwatering during this initial germination phase can significantly affect success, so it’s worth dedicating attention to this phase of lawn establishment. After a few weeks, hopefully you’ll see a light green fuzz appear. This means your seeds have germinated and are actively growing! At this point, irrigation can be reduced to achieve a less frequent but longer duration cycle. Now the seedlings need water in the root zone instead of just on the soil surface, where it could lead to fungal infection or other pathogenic issues. As the seedlings, plugs, and sod grow and root over the following months, irrigation can become less frequent with a longer duration to encourage deeper watering into the soil, letting the soil surface dry out. Finally, remember to adjust irrigation to accommodate a warm-season versus cool-season species; both will need less irrigation when they’re in their dormant phases.
Every site will have its unique considerations for irrigation, so there is rarely a recommended frequency that will fit all needs. Bottom line, regular observation and making changes to irrigation will be a good strategy for the first year of a new lawn. Visiting the Garden and talking to one of our Nursery staff members, booking a home consultation with us, or visiting websites such as WaterWiseSB may help provide further information on irrigating established landscapes or lawns.


Introducing the 805 Initiative: Santa Barbara Botanic Garden’s Local Genetics Nursery Program

Getting Started: Small First Steps Towards Transformation in Cuyama